Are you a Star Wars fan looking to add a touch of creativity to your bathroom routine? Look no further! In this step-by-step guide, we’ll show you how to make your own Star Wars-themed soap using all-natural ingredients and essential oils. Not only will you enjoy the soothing and aromatic benefits of essential oils, but you’ll also have fun creating unique and personalized soap bars. So, gather your supplies and get ready to embark on a homemade soap-making adventure that even Yoda would be proud of!

Homemade Essential Oil Star Wars Soap Recipe
Gathering the Ingredients
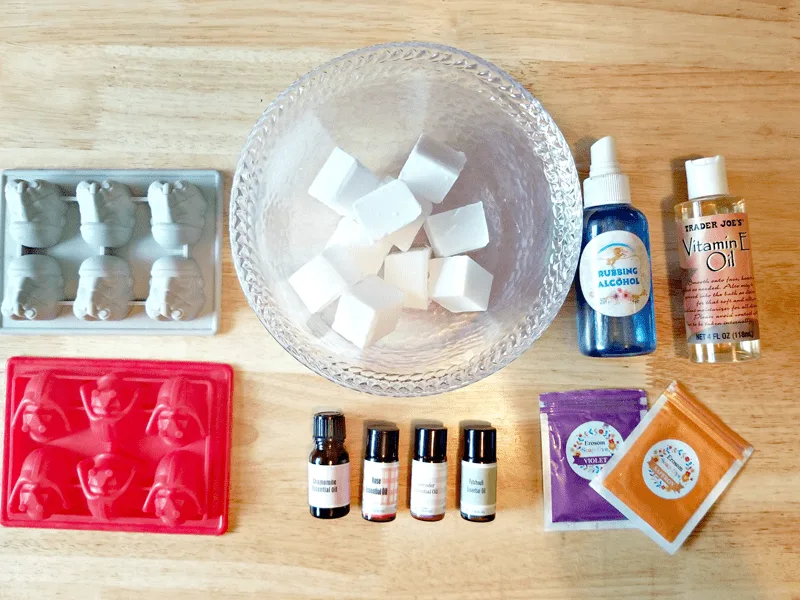
Before we begin, make sure you have all the necessary ingredients at hand. Accurate measurements of ingredients are crucial for achieving the desired consistency and properties in your soap. Use a kitchen scale to measure the soap base and carrier oil precisely. Similarly, count the drops of essential oils carefully to maintain the right balance of fragrance. Here’s what you’ll need:
- 1-pound goats milk melt and pour soap base (readily available on Amazon)
- 2 teaspoons sweet almond oil (you can also use coconut oil, olive oil, or another carrier oil)
- *15-20 drops of tea tree essential oil (for kids under 10, use 5-10 drops of each oil)
- 15-20 drops lavender essential oil
- 15-20 drops patchouli essential oil
- 15-20 drops rose essential oil
- 15-20 drops chamomile essential oil
- Mica powder for coloring (available on Amazon)
- Spray bottle of rubbing alcohol
- Silicone mold (I got mine from Amazon. These are actually ice cube molds that we used because they are the perfect size for smaller hands!)

How to Make Homemade Essential Oil Star Wars Soap
Safety first: Soap-making involves working with hot materials, so always prioritize safety. Wear protective gloves and goggles when handling the soap base and essential oils. Work in a well-ventilated area to avoid inhaling fumes.
Step 1 – Melting the Soap Base
To start, melt the goat’s milk soap base in a microwave-safe bowl. Cut the soap into small cubes to ensure even melting. Place the bowl in the microwave and heat in 30-second intervals, stirring between each interval until the soap is completely melted. Be cautious not to overheat the soap, as it may lose some of its beneficial properties.
Tip: Melt and pour soap bases can harden relatively quickly, so be prepared to work efficiently once the soap is melted. Stir the ingredients thoroughly but gently to ensure even distribution.
Step 2 – Adding the Essential Oils
Once the soap base is melted, it’s time to add the essential oils. Each oil offers unique benefits for your skin and senses. Here’s a breakdown of the essential oils used in this recipe:
- Lavender Essential Oil: Known for its anti-inflammatory and healing properties, lavender oil helps soothe burns, cuts, and scars. It’s also renowned for its relaxation and sleep-inducing effects.
- Patchouli Essential Oil: This oil possesses astringent and anti-inflammatory properties. It uplifts mood, fights fungal growth, and reduces fevers.
- Rose Essential Oil: A favorite among many, rose oil is a natural antiseptic with antifungal, antiviral, and antibacterial properties. It can also fade scars and alleviate anxiety.
- Chamomile Essential Oil: Calming irritated skin, acting as an antibacterial and anti-fungal agent, and providing pain relief are just a few benefits of chamomile oil. It can also fade scars and prevent infections.

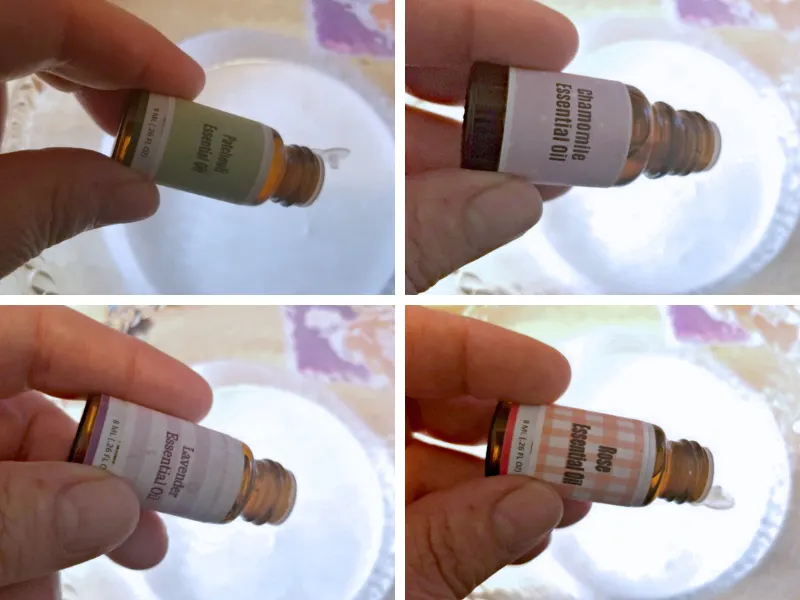
Tip: While the recipe suggests specific essential oils, feel free to experiment and create your own blends. Consider the desired fragrance and potential benefits of different essential oils. However, always check for any skin sensitivities or allergies before using new oils.
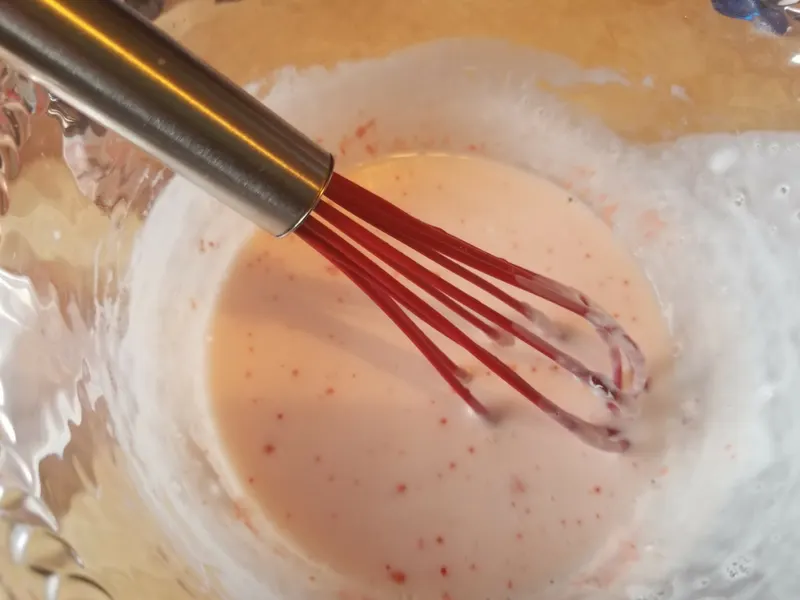
Step 3 – Mixing and Coloring
After adding all the essential oils, thoroughly mix the ingredients to ensure they’re well combined. If you’d like to add a pop of color to your soap, divide the mixture into separate bowls. For example, let’s say we’ll use purple and orange colors for our Star Wars soap.
Add the desired mica powder to each bowl, adjusting the amount to achieve your preferred color intensity. Stir well to evenly distribute the color throughout the soap mixture.
Tip: Mica powder is a popular choice for adding vibrant colors to soap. Start with a small amount of powder and gradually increase until you achieve the desired shade. Remember to mix well to avoid clumps.

Step 4 – Pouring and Setting
With your colored soap mixtures ready, it’s time to pour them into the silicone mold. Alternate pouring the different colors to create a visually appealing design. You can experiment with various patterns and layers to mimic the Star Wars universe’s galactic beauty.

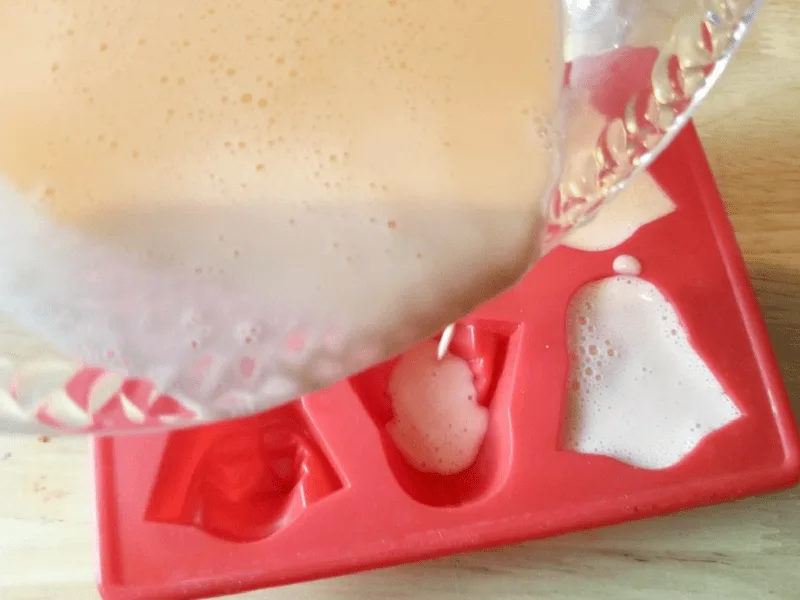
To ensure the soap sets properly and removes any air bubbles, lightly spray the surface of the poured soap with rubbing alcohol. This step helps create a smooth and professional finish.

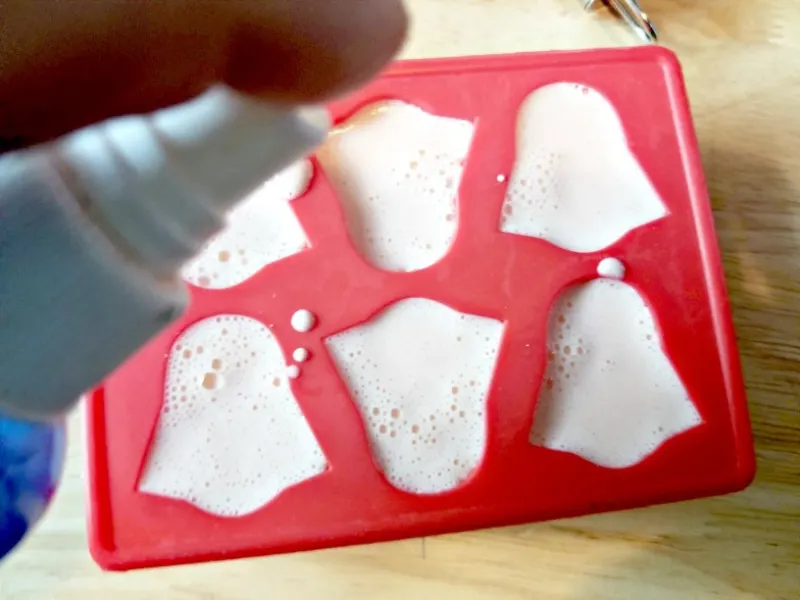
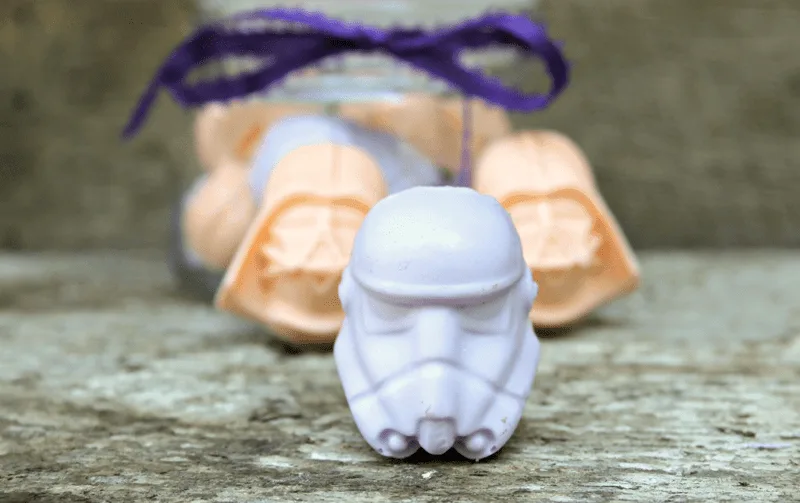
Allow the soap to cool and solidify for several hours or overnight. Once fully set, gently remove the soap from the mold, and voila! You now have your very own homemade Star Wars soap bars.
Remember, practice makes perfect, and don’t be discouraged if your first batch isn’t flawless. Enjoy the process of making homemade soap and have fun experimenting with different combinations until you find your favorite recipe.


Soap Storing Tips
By following these storage tips, you can maintain the quality and longevity of your homemade soap, ensuring it remains effective and enjoyable to use.
Keep it dry: Soap bars should be stored in a dry location. Moisture can cause the soap to soften and dissolve prematurely. Make sure the soap is completely dry before storing it.
Use a soap dish: Invest in a soap dish or tray with drainage holes or slats. This allows the soap to dry between uses, preventing it from sitting in a puddle of water. Choose a dish that allows for good airflow around the soap.
Avoid direct sunlight: Sunlight can fade the colors and scents of your homemade soap. Store the soap in a cool, dry place away from direct sunlight to preserve its appearance and fragrance.
Use airtight packaging: If you’re storing unused soap bars for an extended period, consider wrapping them in plastic wrap or placing them in an airtight container. This helps prevent moisture and humidity from affecting the soap’s quality.
Label and date: If you have multiple batches or varieties of soap, labeling and dating them can help you keep track of their freshness. This is especially useful if you experiment with different recipes or ingredients.
These would be a great DIY addition to a Star Wars bathroom! I also think they would make cute favors for a Star Wars-themed party.
Creating homemade Star Wars soap is an exciting and rewarding project that combines the benefits of essential oils with the thrill of crafting. These all-natural soap bars not only look amazing but also provide nourishing properties for your skin. Whether you’re a Star Wars enthusiast or simply looking to add a touch of individuality to your bathroom, this DIY soap-making adventure is a fantastic way to express your creativity. So, grab your lightsaber (or rather, essential oils) and embark on a journey to bring a little bit of the Force into your everyday routine. May the soap be with you!
VINEVIDA
Sunday 6th of August 2023
This is the perfect gift idea for any Star Wars fan. Thank you for sharing this creative and thoughtful recipe.
Jennifer
Friday 22nd of March 2019
How many does this recipe make with those molds?